How to use lead disqualification
Lead disqualification lets Growform mark a lead as disqualified the moment their answers match rules you define - so junk leads stay out of your CRM, your ad platforms and your inbox, while still being recorded in your results.
A few things you can do with it:
- Stop leads outside your service area reaching your sales team
- Keep Google and Meta optimising towards leads you can actually serve
- Show a polite "sorry, we can't help" ending instead of a thank-you page
Here's how to set it up.
1.) Create a disqualifying reason
Open your form, hit "Edit form settings", then go to the "Lead Disqualification" tab.
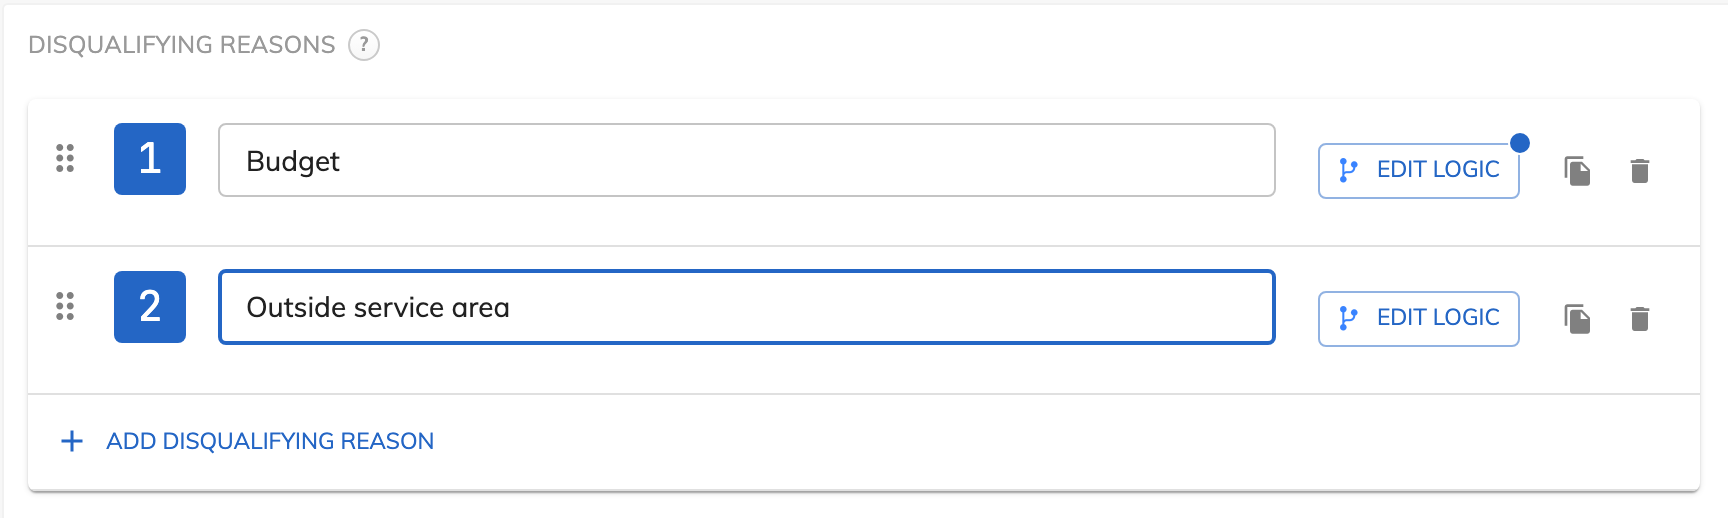
Hit "Add a disqualifying reason" and give it a name that describes why the lead doesn't qualify - something like "Outside service area" or "Budget too low":
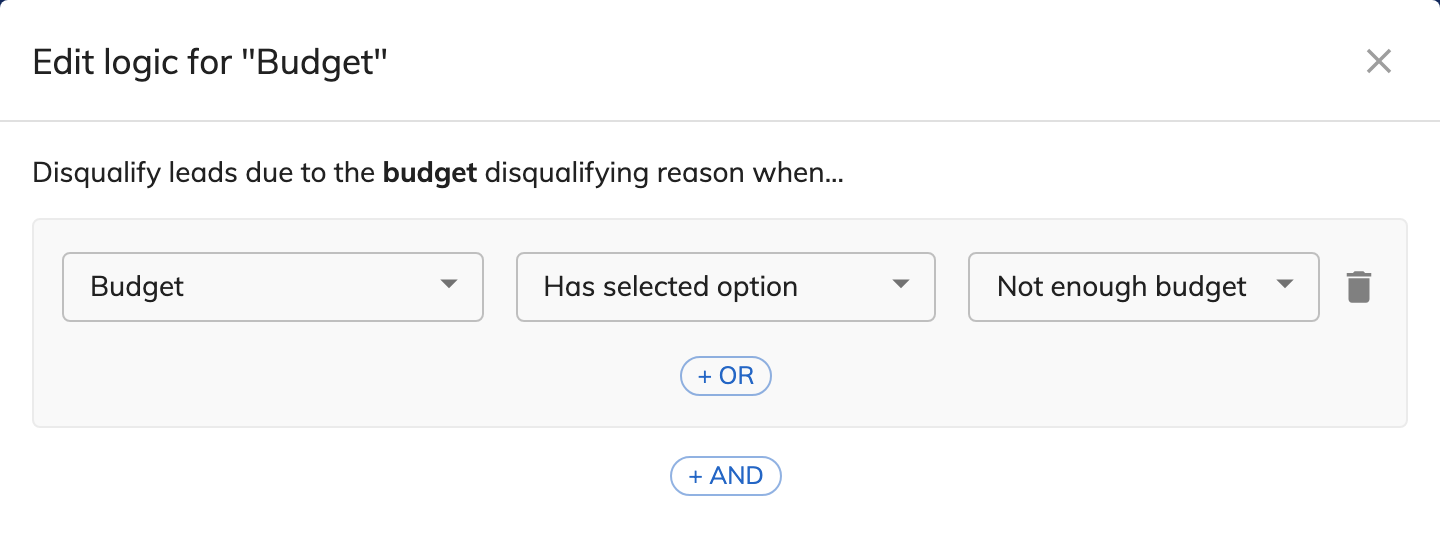
Then hit "Edit logic" on the reason and build the conditional logic that disqualifies the lead - for example, "Budget has selected option Not enough budget":
You can add as many reasons as you like, and rename, duplicate, delete or drag them into a different order. A lead who matches any reason is disqualified.
Don't forget to hit "Save disqualification settings"!
2.) Decide what happens to disqualified leads
Underneath your reasons, you'll find two toggles under "Disqualification behaviour":

"Prevent disqualified leads from filling in the rest of the form" - when this is on, a disqualified lead is taken straight to their ending rather than continuing through your remaining steps. Leave it off if you'd still like to collect the rest of their answers (useful for understanding why leads don't qualify).
"Prevent disqualified leads being sent to Zapier, webhooks and email" - when this is on, disqualified leads stay inside Growform. They won't reach your Zaps, webhooks or email notifications, but you can still review them in your results.
3.) Show disqualified leads a different ending
By default, disqualified leads see your normal ending. You'll usually want to show them something different - a "sorry" message, or a redirect to a different page.
To do this, open the step dropdown in the top-left of the builder and hit "Edit steps & endings". Hit "Add ending", choose "In-form ending" (a message) or "Redirect" (a different page), then hit "Edit logic" and choose your disqualifying reason as the condition:

Endings are checked top-down, and the user gets the first ending whose logic matches - so put your disqualification ending above the fallback. Our guide to endings and redirects covers endings in more detail.
4.) Keep disqualified leads out of your conversion tracking
If you're firing conversions to an ad platform, you probably don't want to count disqualified leads - that just teaches the algorithm to find more of them.
Under "Edit form settings" > "Tracking & tagging", the Google Ads, Facebook (Meta) Pixel, Microsoft Advertising and Twitter integrations each have a "qualified leads only" toggle - for example, "Fire Facebook conversion tag for qualified leads only". Flip it on and the tag simply won't fire for disqualified leads:

The "Custom HTML / JavaScript" section has the same toggle ("Fire custom script for qualified leads only"), so any custom pixel code can respect disqualification too.
5.) For Google Tag Manager users
On submission, Growform now pushes two extra events to the dataLayer alongside the usual growformFormCompleted:
- growformFormCompletedQualified - fires when the lead is qualified
- growformFormCompletedDisqualified - fires when the lead is disqualified
Trigger your conversion tags on growformFormCompletedQualified and they'll ignore disqualified leads.
Finally, a note for anyone consuming submissions downstream: the submission payload now includes a disqualificationReasons field listing any reasons the lead matched, so your webhook or Zapier setup can branch on it.